Proper maintenance of the extrusion system is essential for consistent print quality and machine longevity.
This guide provides clear, step-by-step instructions for maintaining key components: extruder gears, filament detection, cutter blades, vibration compensation, and nozzle care.
1. Extruder Gear Maintenance
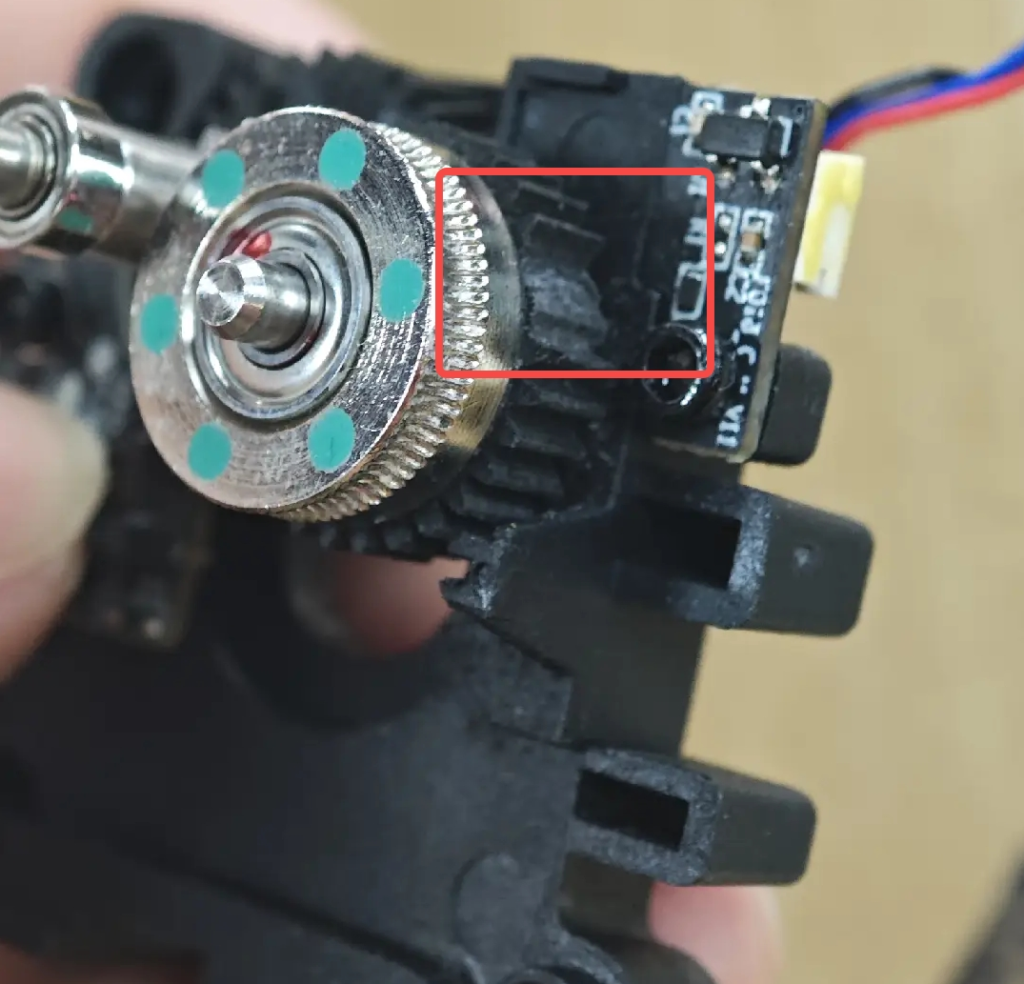
The gears that push filament into the hotend require regular cleaning to prevent slippage and grinding.
When to Maintain
- Routine: Every 50 print hours or monthly (whichever comes first)
- Warning Signs:
- Visible filament shreds around gears
- Deep bite marks on filament (>0.3mm depth)
- Grinding noises during extrusion

Cleaning Procedure
① Preparation
- Turn off the printer and wait until the nozzle temperature drops below 40°C (check via screen).
- Ground yourself by touching the metal frame.
② Disassembly
- Remove 4 PH00 screws from the gear cover (note: the top-left screw has a spring washer).
- Lift the cover’s right-side latch and rotate clockwise 5° to open.
③ Cleaning
- Use an 8mm nylon brush to clean gear teeth in the opposite direction of rotation.
- For stubborn residue:
- PLA: Freeze with cooling spray for 2 minutes before brushing.
- PETG: Wipe with 75% isopropyl alcohol.
- Check gear wear: Replace if teeth are chipped (>0.5mm) or show crescent-shaped grooves.
④ Reassembly
- Apply lithium-based grease (pea-sized amount) to gear shafts.
- Test rotation: Gears should spin freely without resistance.
Troubleshooting
- Uneven Filament Bite: Adjust gear spacing using printer paper – proper tension allows sliding with slight resistance.
- Slipping Filament: Increase spring pressure until 100mm extrusion test shows ≤3mm deviation.
2. Filament Detection Module
The blue LED sensor monitors filament presence. Malfunctions cause false alarms or undetected jams.
Diagnosis Steps
① Basic Checks
- Ensure only one filament source (CFS or external spool) is connected.
- Inspect the feed tube entrance for debris.
② Advanced Cleaning
- Use a borescope to check the sensor channel (focus on 2mm diameter area).
- Remove particles with 0.5mm cleaning wire and compressed air.
③ Electrical Test
- Multimeter reading should be 3.3V±0.2V.
- Short-circuit the sensor terminals: Blue light should turn off immediately.
Maintenance Tips
- Clean the sensor lens monthly with alcohol wipes.
- Apply dielectric grease to connectors in humid environments.
3. Cutter Blade Replacement
Dull blades cause incomplete cuts and failed auto-filament changes.
Replacement Rules
- PLA/ABS: Replace after 500 cuts or 5 spools (1kg each).
- Carbon Fiber: Replace after every spool.
Installation Guide
① Remove Old Blade
- Use a magnetic screwdriver (M2×4mm screws).
- Rotate the blade holder 30° counterclockwise to detach.
② Install New Blade
- Orient the blade with laser-etched text facing outward.
- Tighten screws in two stages: Snug first, then 90° final turn.
③ Calibration
- Run “Cutter Calibration” in settings.
- Test cuts should leave ≤2mm filament tail.
4. Vibration Compensation Calibration
This feature reduces surface patterns (ringing) by optimizing motion settings.
Setup Requirements
- Stable surface: Place printer on concrete or 18mm+ thick wood.
- No disturbances during calibration (15-minute process).
Calibration Steps
① Navigate to **Settings > Self-Test**.
② Select Belt Tension Check and **Vibration Compensation**.
③ Follow on-screen XYZ-axis calibration prompts.
Verification
- Print a 20mm test cube.
- Pass criteria:
- Surface ripples ≤0.05mm amplitude.
- Dimension accuracy ±0.1mm.
5. Nozzle Clogs & Maintenance
Clearing Blockages
① Softening Phase
- Heat nozzle 20°C above filament melting point (e.g., 210°C for PLA).
- Wait 5 minutes for thorough heat penetration.
② Clearing Technique
- Insert 0.4mm cleaning needle (matches nozzle size).
- Rotate clockwise at 2 seconds per full turn.
③ Cooling Method
- Wrap heatsink with a damp cloth to accelerate cooling.
- Remove needle only when temperature <50°C.
Nozzle Replacement
- Tighten new nozzles to 0.6-0.8N·m (over-tightening warps the heat break).
- Allow slight material oozing (≤1mm) during initial heating.
Maintenance Schedule
| Task | Frequency | Time Required |
| Gear Cleaning | 50 Hours | 20 Minutes |
| Cutter Check | Per Spool | 5 Minutes |
| Vibration Calibration | Monthly | 30 Minutes |
| Full Maintenance | Quarterly | 2 Hours |
Essential Toolkit
- Precision screwdrivers (PH00/PH0)
- Digital calipers (±0.01mm accuracy)
- 0.4-0.6mm cleaning needles
- Thermal gloves (300°C rated)
Safety Reminders
- Never touch hot components without gloves.
- Use only 3D printer-approved lubricants.
- Disconnect power for 5 minutes before handling electronics.
By following this guide, you’ll prevent 90% of extrusion-related failures. Scan the QR code on your printer for video tutorials. Consistent maintenance ensures better prints and fewer headaches – your future self will thank you!


Leave a Reply