Introduction: Why Replacing Desiccants Matters
Moisture is one of the biggest threats to high-quality 3D printing. It can silently degrade filament performance, leading to nozzle clogs, weak prints, and wasted material. For 3D printing enthusiasts and professionals alike, keeping filaments dry is essential.
The Creality Filament system (CFS) combats moisture by using calcium chloride desiccants to maintain a dry environment. Over time, these desiccants lose their effectiveness, requiring replacement.
In this guide, we’ll show you how to replace your CFS desiccants step by step, so you can protect your filament and achieve optimal print results.
Step-by-Step Guide: Replacing the Desiccants in Your CFS Storage System
Step 1: Locate the Desiccant Compartments
The CFS system has two dedicated compartments designed for desiccant bags. These compartments regulate humidity inside the storage box, ensuring your filaments remain moisture-free.

Step 2: Remove the Mesh Cover
Identify the small port above the mesh cover on the first compartment. Gently press this port with your fingertips to release and remove the cover.

Step 3: Dispose of the Old Desiccant Bag
Carefully take out the used desiccant bag. You might notice it feels heavier, indicating it has absorbed moisture. Dispose of it responsibly, as it cannot be reused.
Step 4: Prepare the New Desiccant Bag
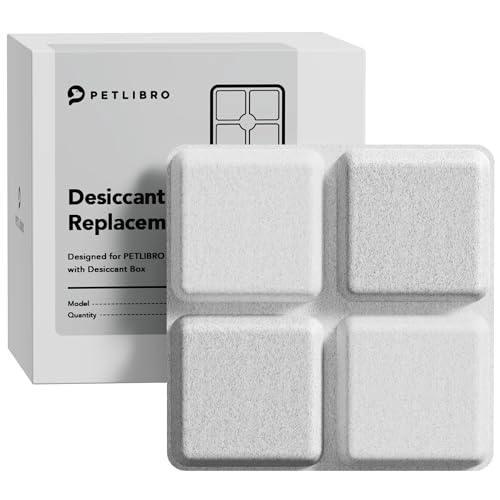
Unpack a new calcium chloride desiccant bag. Remove its outer packaging just before placing it in the compartment to prevent premature moisture absorption.
Step 5: Insert the New Desiccant Bag
Place the new bag into the compartment. Ensure it lies flat and fits snugly to maximize its effectiveness.
Step 6: Reattach the Mesh Cover
Secure the mesh cover by inserting the bottom edge first, then press the top until you hear a click. This ensures the cover is locked in place.
Step 7: Repeat for the Second Compartment
Move to the second compartment and repeat the process. Keeping both compartments filled with fresh desiccants ensures consistent low humidity throughout the storage unit.
Practical Tips for Effective Filament Storage
- Monitor for Moisture: If you notice changes in filament performance—such as brittleness, bubbling, or stringy prints—it’s time to replace the desiccant.
- Choose the Right Desiccants: Use bags that fit the compartment dimensions (120mm × 85mm × 20mm) and are made of calcium chloride for best results.
- Store Desiccants Properly: Always keep replacement desiccants sealed in their original packaging until ready to use.
Common Questions About CFS Desiccants
How Often Should I Replace Desiccants?
The replacement frequency depends on your storage environment. If you’re in a humid area, check your desiccants every 1–2 months.
Where Can I Buy Replacement Desiccants?
You can find calcium chloride desiccants on Amazon, local hardware stores, or specialty 3D printing suppliers.
Can I Reuse Old Desiccants?
No, desiccants in the CFS system are single-use. Once saturated, they lose their moisture-absorbing properties.
Why Regular Maintenance is Crucial for 3D Printing Success
Maintaining a low-humidity environment for your filament ensures consistent print quality and reduces the risk of common issues like stringing, clogging, and layer adhesion problems. \
For professionals, this maintenance step is essential for meeting deadlines and delivering high-precision results. Hobbyists will appreciate the reduced frustration and waste, making every project smoother and more enjoyable.
By regularly replacing your CFS desiccants, you’re protecting your filament investment and optimizing your entire printing workflow.
Final Thoughts
Replacing the desiccant in your CFS system is a simple yet vital step to ensure your filaments remain in perfect condition. Whether you’re a professional or a hobbyist, this regular maintenance will save you time, money, and frustration in the long run.
Take action today: replace your CFS desiccant, protect your filament, and enjoy smoother, more consistent 3D printing results!


Leave a Reply