Introduction
Have you noticed filament jams, inconsistent extrusion, or decreased print quality in your 3D printer? These common issues often stem from worn-out PTFE tubes in the CFS Hub. Regular maintenance, including tube replacement, can prevent these problems and keep your printer running smoothly.
In this guide, we’ll show you how to replace the PTFE tubes step by step, ensuring high-quality prints and prolonging your printer’s lifespan.
- 16 COLORS TO ENHANCE YOUR CREATIVITY: The Creality Filament System (CFS) has a connection hub on the…
- SNAPSHOT SUPPORT IS ENABLED: the CFS is able to provide model support in different materials. It can…
- AUTOMATIC FILAMENT MAPPING: The CFS is programmed to communicate seamlessly using Creality 3D…
- AUTOMATIC FILAMENT SWITCHING AND RELAYS: The CFS is able to switch filaments smoothly and accurately…
- AUTOMATIC RUNOUT/TANGLE DETECTION: Sensors are used to monitor each filament reel. It will pause and…
What You’ll Need
To ensure a smooth replacement process, gather the following tools and materials:
- PTFE Tubes (x4): High-quality tubes for smooth filament feeding.
- L-Wrench: Essential for removing screws and securing parts.
Tip: Purchase PTFE tubes designed for high heat resistance and low friction to improve extrusion performance.
| Preview | Product | Rating | Price | |
|---|---|---|---|---|

| Asbrot Compatible with Bambu Lab PTFE Tube 2.5mm ID×4mm OD, Length 5M/ 16.4ft, for Bambu lab AMS… |
$9.99 | Buy on Amazon |
| Preview | Product | Rating | Price | |
|---|---|---|---|---|

| EFFICERE 30-Piece Premium Hex Key Allen Wrench Set, SAE and Metric Assortment, L Shape, Chrome… |
$11.99
$10.99 | Buy on Amazon |
Step-by-Step Process to Replace PTFE Tubes
Step 1: Disconnect the Existing PTFE Tubes
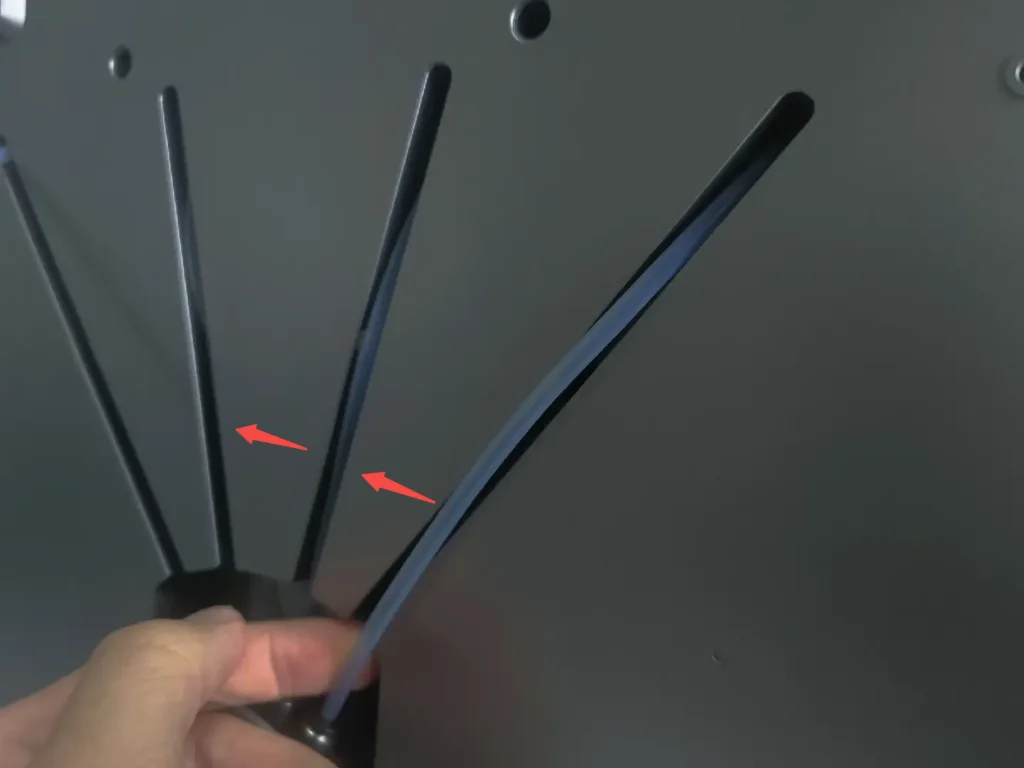
Begin by disconnecting the worn PTFE tubes:
- Press the pneumatic connector’s terminal to release each tube.
- Gently pull the tubes out, ensuring you don’t damage the connectors.
Pro Tip: Never pull a tube without pressing the terminal—it can cause damage to the connector or misalign the assembly.
Step 2: Remove the Bottom Screws

Use the L-wrench to unscrew the four screws securing the bottom panel of the hub.
- Place the screws in a safe spot to prevent loss during reassembly.
Why This Matters: Removing the bottom panel provides access to the extrusion module and PTFE tubes, making replacement easier.
Step 3: Detach the Cable and Feeding Module

Carefully lift the feeding module:
- Remove the cable cover to expose the motor adapter board.
- Gently disconnect the cable, taking care to avoid damaging the connectors.
Tip: Clean any filament residue or dust around the connectors with compressed air before reassembly.
Step 4: Remove the Extrusion Module
Detach the extrusion module entirely to expose all the PTFE tube connections. This step is essential for replacing the tubes securely.
Step 5: Disconnect the Remaining Tubes
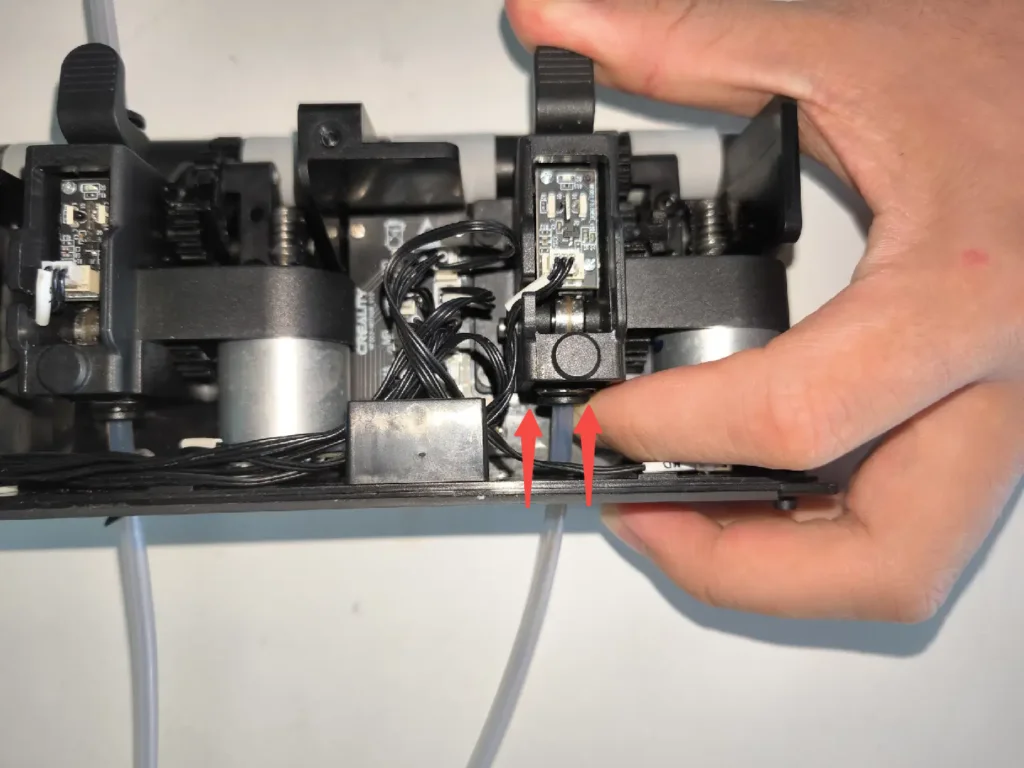
Ensure all four PTFE tubes are fully disconnected. Double-check each connection point to prevent alignment issues during reassembly.
Step 6: Insert New PTFE Tubes
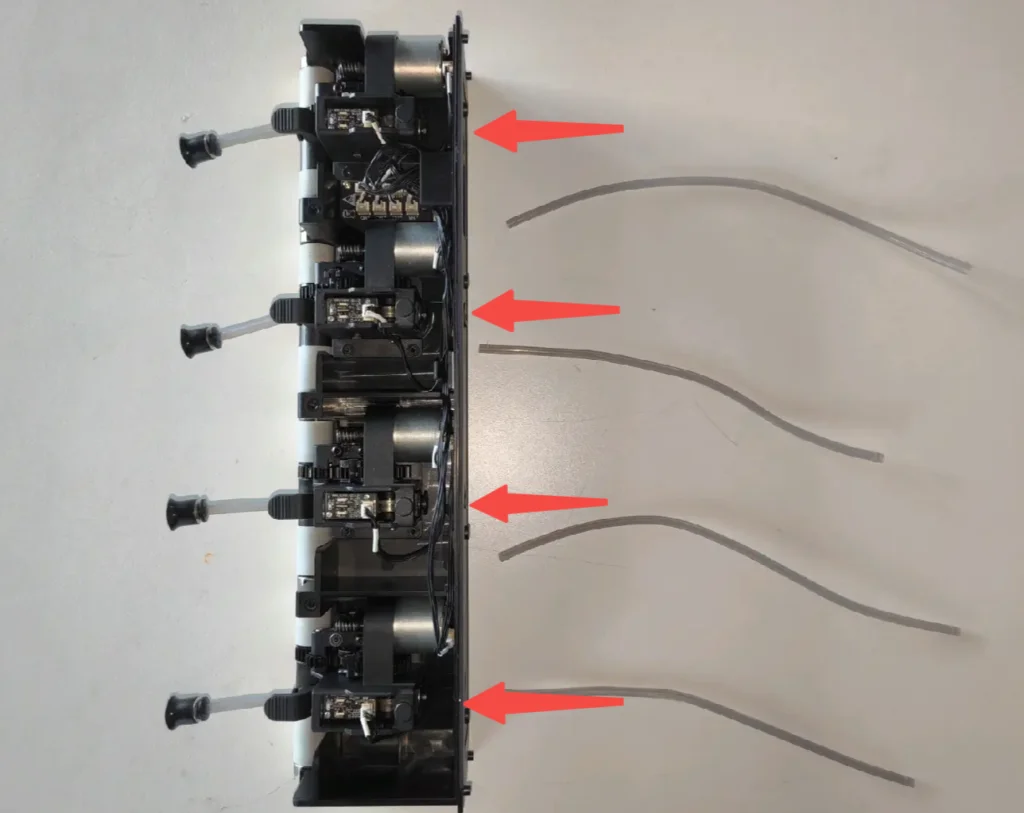
Replace the old tubes with high-quality PTFE tubes:
- Insert the tubes carefully into their designated slots.
- Rotate them slightly while inserting for a snug fit.
Maintenance Tip: Check the connectors and slots for debris before inserting the new tubes. Clean them if needed to ensure smooth filament feeding.
Step 7: Reassemble the Feeding Module
- Guide the new PTFE tubes through the reserved holes.
- Reconnect the cable securely to the motor adapter board.
- Press the feeding module into place until it clicks securely.
Step 8: Secure the Bottom Panel
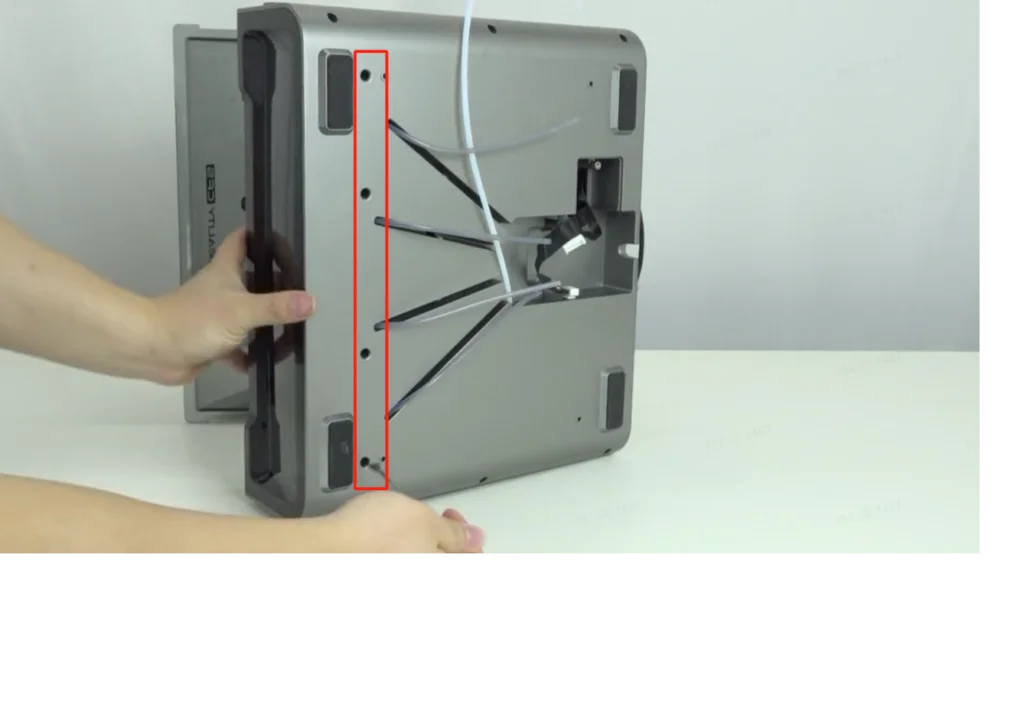
Reattach the bottom panel using the screws removed earlier. Tighten them evenly to maintain a balanced assembly.
Step 9: Connect the New PTFE Tubes
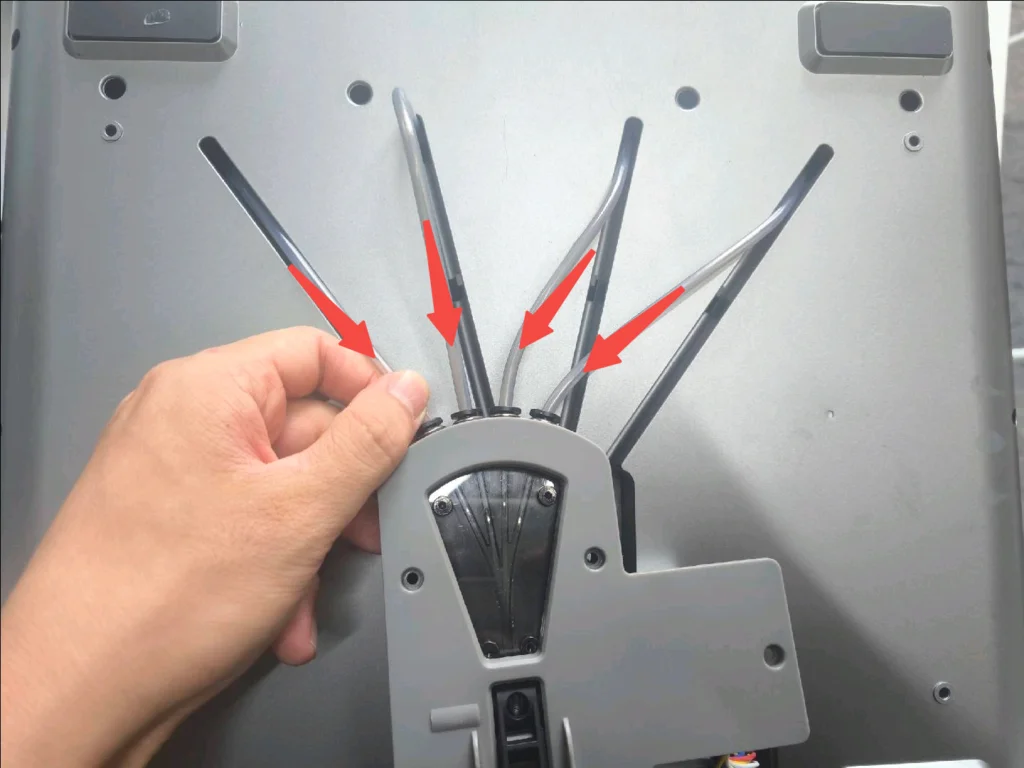
Finally, reconnect the new PTFE tubes to the hub:
- Insert each tube into the pneumatic connectors until they click securely.
- Align the tubes in their limit slots for proper filament feeding.
Final Checks and Best Practices
After completing the replacement:
- Manually feed filament through the tubes to confirm smooth operation.
- Run a quick test print to verify proper filament feeding and extrusion.
Best Practice: Regularly inspect your PTFE tubes for wear or residue buildup. Replace them every 3-6 months for optimal performance, especially if you print frequently.
Conclusion
Replacing PTFE tubes in the CFS Hub is a vital maintenance task that can prevent filament jams and ensure smooth extrusion. By following this step-by-step guide, you’ll maintain consistent print quality and prolong the life of your 3D printer.
Have questions or tips? Share your thoughts in the comments below!


Leave a Reply