Introduction
Are you facing challenges with TPU printing on your Ender-5 Max? Many 3D printing enthusiasts encounter similar hurdles. This guide is here to help you tackle common challenges related to TPU’s flexibility and the printer’s PTFE tube design.
This guide provides a step-by-step approach to ensure a smooth TPU printing experience, covering everything from setup to troubleshooting.
Step 1: Preparation
To successfully print TPU, careful preparation is essential. The Ender-5 Max’s PTFE tube design can cause feeding resistance, resulting in issues like empty or insufficient extrusion.
To overcome these common challenges, try implementing the following proven steps:
- Adjust Filament Feeding
- Open the upper cover of the printer. Feed TPU filament directly from the top of the machine instead of using the built-in spool holder or PTFE tube. Place the filament spool on a stand or elevated platform above the printer to minimize feeding resistance and ensure consistent filament flow.
Note: The Filament Detector Kit function will not work with this method. You can insert a short piece of filament into the detector to bypass it or disable the function entirely during printing.
- Secure the PTFE Tube
- Fix the PTFE tube securely to prevent it from scratching or interfering with the model during the printing process.
- Dry the Filament
- TPU’s hygroscopic nature means it readily absorbs moisture, leading to print defects such as stringiness, inconsistent extrusion, and surface imperfections.
- Common signs of moisture-related issues include excessive stringing between parts of the print, a rough or uneven surface finish, and audible popping sounds during extrusion.
- Always use newly opened filament or dry your filament before printing. For drying, use a filament dryer or preheat your oven to 50–60°C (122–140°F) and dry the filament for 4–6 hours to ensure optimal performance.
- Choose the Right TPU
- Opt for TPU with a hardness of 95A or higher (e.g., TPU95A or TPU64D). Softer materials may be harder to control and cause feeding issues.
Step 2: Slicing Settings
Optimizing slicing settings is key to achieving great results with TPU filament. Consider the following adjustments:
- Select the Correct Profile
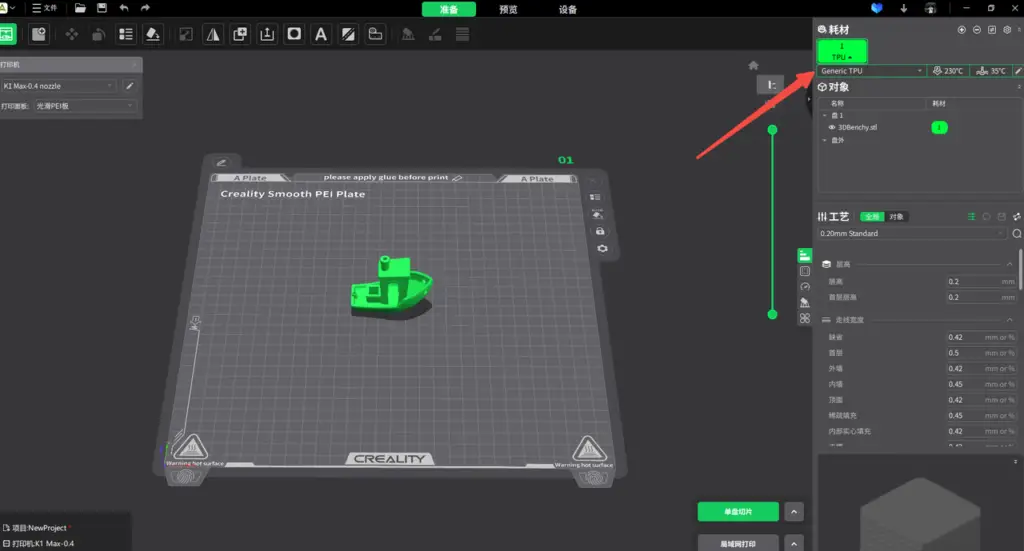
- Select ‘Generic TPU’ or ‘CR-TPU’ as your filament profile in the slicer. These profiles are tailored for flexible materials, providing superior extrusion consistency and enhancing surface quality.
- Adjust Printing Speed
- Set the printing speed to 50mm/s or lower. TPU’s flexibility makes it prone to inconsistent extrusion at higher speeds, which can lead to poor print quality.
- Fine-Tune Temperature
- Set the printing temperature between 205°C and 215°C.
- If you notice poor surface quality, reduce the temperature incrementally within this range.

Troubleshooting and Common Issues
With careful preparation, you can prevent many issues. However, if problems do arise, here are some common challenges and their solutions:
- Empty Extrusion or Under-Extrusion
- Check the filament path for obstructions.
- Ensure the filament spool is positioned correctly and feeding smoothly.
- Stringiness or Poor Surface Quality
- Dry the filament thoroughly before use.
- Reduce the print temperature slightly.
- Filament Jamming
- Clean the extruder and PTFE tube to remove debris.
- Use TPU with a higher hardness rating to improve flow consistency.
- Model Warping or Detachment
- Increase bed adhesion by using a glue stick, painter’s tape, or a TPU-compatible adhesive sheet.
- Ensure the build plate is level and preheated appropriately.
Additional Tips and Safety Precautions
- Storage: Store TPU filament in an airtight container with desiccants to protect it from moisture, ensuring consistent printing results in the future.
- Handling: Avoid bending or stretching TPU filament excessively during feeding.
- Environment: Maintain a stable ambient temperature to prevent printing inconsistencies.
Conclusion
Successfully printing TPU with the Ender-5 Max demands meticulous preparation and precise adjustments, but the outcome—flexible, durable prints—justifies the effort. By following this guide, you can achieve flexible, durable, and high-quality prints. By following these tips, you’ll enjoy a smoother printing experience and create high-quality TPU prints with ease. Proper filament storage ensures you’re always ready for your next project, maintaining consistent results.


Leave a Reply